
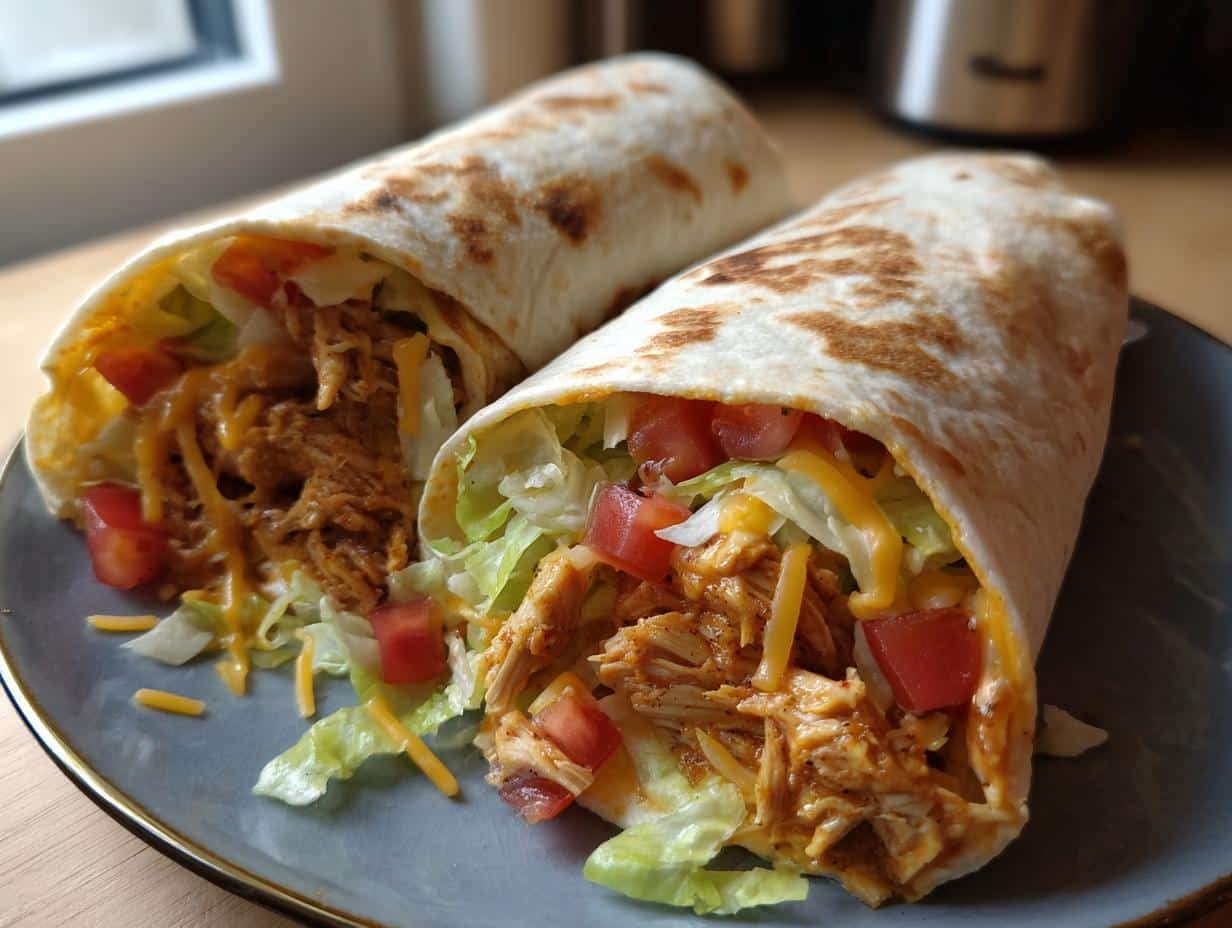
Cheesy Garlic Chicken Wraps: 7 Minutes to Irresistible Bliss

If you’re craving something delicious yet super easy to whip up, look no further than my Cheesy Garlic Chicken Wraps! These wraps are a flavor explosion wrapped in a soft tortilla, combining tender, shredded chicken with gooey melted cheese and a hint of garlic that’ll make your taste buds sing. Trust me, there’s nothing quite like the smell of garlic sautéing in your kitchen—it’s pure magic! Plus, they come together in just about 20 minutes, making them the perfect go-to meal for busy weeknights or lazy weekends. Once you try these, you’ll want to keep them in your weekly rotation. So, let’s get cooking and bring some cheesy goodness to your table!
Ingredients List
Let’s gather everything we need to make these mouthwatering Cheesy Garlic Chicken Wraps! Here’s what you’ll need:
- 2 cups cooked chicken, shredded: I love using rotisserie chicken for convenience, but any cooked chicken will do!
- 1 cup shredded cheese: Choose your favorite—cheddar, mozzarella, or even a spicy pepper jack for a kick!
- 2 cloves garlic, minced: Fresh garlic is key for that amazing flavor. Don’t skimp on this!
- 1/4 cup mayonnaise: This adds creaminess and helps everything stick together.
- 4 large tortillas: Flour tortillas work best for wrapping, but feel free to use whole wheat or corn if you prefer.
- 1/2 cup lettuce, shredded: Adds a nice crunch—use romaine or iceberg for the best texture.
- 1/4 cup diced tomatoes: Fresh tomatoes add a burst of flavor, but you can swap in salsa if you’re in a hurry!
- 1 tablespoon olive oil: Just a little for sautéing the garlic and chicken to perfection.
How to Prepare Cheesy Garlic Chicken Wraps
Now that we’ve gathered our ingredients, it’s time to bring everything together and create these delicious Cheesy Garlic Chicken Wraps! Follow along with these simple steps, and you’ll have a flavorful meal ready in no time.
Step-by-Step Instructions
- First things first, heat that olive oil in a large pan over medium heat. You want it hot enough to sizzle but not so hot that it starts smoking—around 2 minutes should do the trick!
- Once the oil is shimmering, toss in the minced garlic and sauté it for about 1 minute. You’ll know it’s ready when it’s fragrant and slightly golden—just be careful not to burn it!
- Now, add in your shredded chicken. Give it a good stir to combine with the garlic, letting it heat through for about 2-3 minutes. This is where the magic happens—mixing those flavors together!
- Next, stir in the mayonnaise and shredded cheese. Keep stirring until the cheese is melted and everything is nice and creamy. This should take another 2 minutes—just enough time to get excited about how good this is going to be!
- Now, grab your tortillas and lay them flat on a clean surface. Spoon a generous amount of the chicken mixture down the center of each tortilla.
- Top each wrap with some shredded lettuce and diced tomatoes for that fresh crunch. You can even add hot sauce here if you like it spicy!
- Finally, roll each tortilla tightly, tucking in the ends as you go to keep all that cheesy goodness inside. Serve warm, and get ready to enjoy a delightful meal!
Nutritional Information Disclaimer
Keep in mind that the nutritional information for these Cheesy Garlic Chicken Wraps can vary based on the specific ingredients and brands you use. The values provided are estimates and might not be precise, so feel free to adjust them according to your preferences and dietary needs!
Why You’ll Love This Recipe
- Quick and Easy: These wraps come together in just 20 minutes, making them perfect for busy weeknights or last-minute meals.
- Delicious Flavor: The combination of cheesy goodness, savory garlic, and tender chicken is simply irresistible!
- Customizable: You can easily switch up ingredients—try different cheeses or add your favorite veggies for a personal touch.
- Minimal Cleanup: With just one pan needed for cooking, cleanup is a breeze—who doesn’t love that?
- Kid-Friendly: These wraps are a hit with kids and adults alike, making family dinners a joy!
Tips for Success
To make sure your Cheesy Garlic Chicken Wraps turn out perfect every time, here are some of my favorite tips! First, don’t rush the sautéing of the garlic; it adds so much flavor, but burnt garlic can ruin the dish. If you want an extra creamy filling, feel free to add a splash of milk or cream to the mixture—trust me, it makes a difference! For a bit of crunch, you can toast your tortillas in the pan for a minute on each side before filling them. And remember, let the wraps sit for a minute before slicing; this helps everything hold together beautifully!
Variations
One of the best things about these Cheesy Garlic Chicken Wraps is how easily they can be customized! If you’re in the mood for something different, try swapping out the chicken for shredded beef or even black beans for a vegetarian twist. Want to add a little zing? Toss in some diced jalapeños or a sprinkle of chili powder to the chicken mixture. If you’re a fan of herbs, fresh cilantro or parsley can add a delightful freshness. Feeling adventurous? Experiment with different cheeses like feta or gouda for a unique flavor profile. The possibilities are endless—make it your own!
Storage & Reheating Instructions
To keep your Cheesy Garlic Chicken Wraps fresh and tasty, store any leftovers in an airtight container in the fridge. They should be good for about 3 days—if they last that long! When you’re ready to enjoy them again, you can reheat the wraps in a skillet over medium heat for about 3-4 minutes on each side until heated through. This helps keep the tortillas nice and soft while making sure the filling is warm and cheesy. If you’re in a hurry, you can microwave them for about 30 seconds to a minute, but they won’t have that lovely crispiness. Enjoy every cheesy bite!
Serving Suggestions
These Cheesy Garlic Chicken Wraps are a meal on their own, but why not take it up a notch with some delicious sides? I love pairing them with a vibrant mixed greens salad dressed in a tangy vinaigrette for a refreshing balance. If you’re in the mood for something heartier, some crispy sweet potato fries or a side of homemade coleslaw adds a delightful crunch! And let’s not forget about drinks—try serving them with a chilled glass of lemonade or a light beer for the adults. For a fun twist, a zesty salsa or guacamole on the side makes for a perfect dip. Enjoy your cheesy feast!
PrintCheesy Garlic Chicken Wraps: 7 Minutes to Irresistible Bliss

Cheesy Garlic Chicken Wraps are a delicious and easy meal option. They combine tender chicken with melted cheese and garlic for a flavorful dish.
- Prep Time: 10 minutes
- Cook Time: 10 minutes
- Total Time: 20 minutes
- Yield: 4 wraps 1x
- Category: Main Course
- Method: Stovetop
- Cuisine: American
- Diet: Low Calorie
Ingredients
Scale
- 2 cups cooked chicken, shredded
- 1 cup shredded cheese
- 2 cloves garlic, minced
- 1/4 cup mayonnaise
- 4 large tortillas
- 1/2 cup lettuce, shredded
- 1/4 cup diced tomatoes
- 1 tablespoon olive oil
Instructions
- Heat olive oil in a pan over medium heat.
- Add minced garlic and sauté for 1 minute.
- Add shredded chicken and mix well.
- Stir in mayonnaise and cheese until melted.
- Lay tortillas flat and fill with chicken mixture.
- Add lettuce and tomatoes on top.
- Wrap tortillas tightly and serve warm.
Notes
- Use rotisserie chicken for convenience.
- Substitute cheese for your favorite type.
- Add hot sauce for extra spice.
Nutrition
- Serving Size: 1 wrap
- Calories: 350
- Sugar: 2g
- Sodium: 600mg
- Fat: 15g
- Saturated Fat: 5g
- Unsaturated Fat: 8g
- Trans Fat: 0g
- Carbohydrates: 30g
- Fiber: 3g
- Protein: 25g
- Cholesterol: 70mg
Keywords: Cheesy Garlic Chicken Wraps, Chicken Wraps, Easy Chicken Recipes


What do you think?
Share your thoughts, tips, or variations on this recipe!