
Baked Sesame Chicken: 7 Irresistible Tips for Perfection

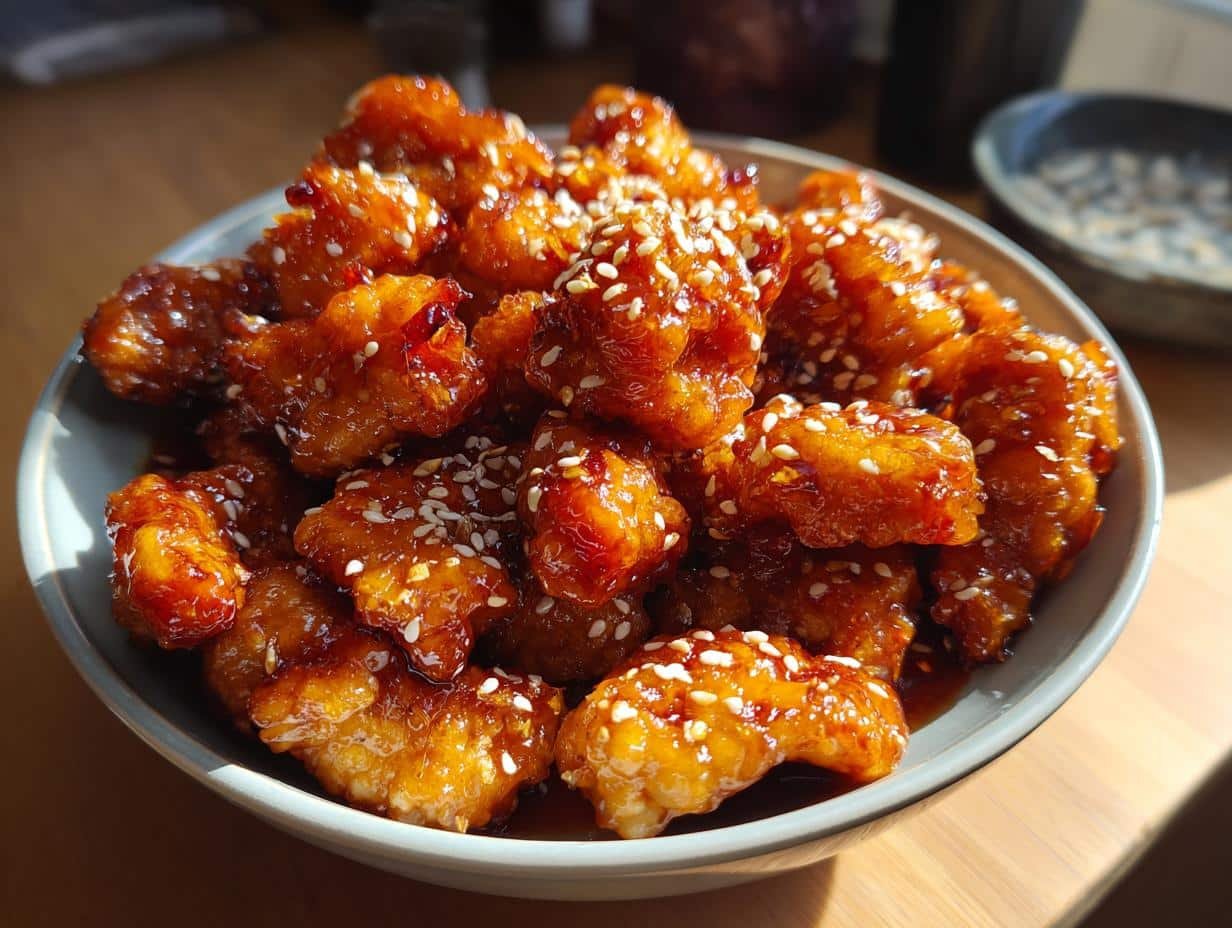
Let me tell you, there’s something magical about *Baked Sesame Chicken*! It’s crispy on the outside, tender on the inside, and packed with a flavor that’ll make your taste buds dance. The sweet and savory glaze just brings everything together in the most delightful way.
I remember the first time I made it for my family; the smiles on their faces were priceless! This has quickly become one of my go-to recipes for weeknight dinners or when I want to impress guests without spending all day in the kitchen. Trust me, you’re going to love it!
Ingredients List
- 1 lb chicken breast, cut into bite-sized pieces
- 1/4 cup soy sauce
- 2 tbsp sesame oil
- 2 tbsp honey
- 1 tbsp rice vinegar
- 2 cloves garlic, minced
- 1 tbsp ginger, minced
- 1/4 cup sesame seeds
- Salt and pepper to taste
How to Prepare Instructions
Making *Baked Sesame Chicken* is super simple, and I promise you’ll feel like a kitchen pro! Start by preheating your oven to 400°F (200°C). While that’s heating up, grab a bowl and mix together the soy sauce, sesame oil, honey, rice vinegar, minced garlic, and ginger. This marinade is where the magic happens, so make sure it’s well combined!
Next, toss your bite-sized chicken pieces into the marinade, giving them a good mix to coat every piece. Let that sit for about 30 minutes to soak up all those delicious flavors. Once marinated, spread the chicken out on a baking sheet lined with parchment paper and don’t forget to sprinkle those sesame seeds all over the top. Bake for 20-25 minutes until the chicken is cooked through and golden brown. Serve it up with rice or veggies, and enjoy every crispy, flavorful bite!
Step-by-Step Instructions
- Preheat your oven to 400°F (200°C).
- In a bowl, combine soy sauce, sesame oil, honey, rice vinegar, garlic, and ginger.
- Add the chicken pieces and mix well, letting them marinate for 30 minutes.
- Spread the marinated chicken on a parchment-lined baking sheet.
- Sprinkle sesame seeds over the chicken.
- Bake for 20-25 minutes, or until the chicken is fully cooked and golden.
- Serve with your favorite rice or steamed vegetables.
Why You’ll Love This Recipe
- Quick and easy to prepare—perfect for busy weeknights!
- Crispy texture that satisfies your cravings without frying.
- Healthy ingredients that pack a punch of flavor and nutrition.
- Sweet and savory glaze that’s utterly irresistible.
- Versatile dish—great with rice, noodles, or steamed veggies.
- Perfect for meal prep; enjoy it hot or as a tasty cold lunch.
- Kid-friendly—my little ones can’t get enough of it!
- Impressive enough to serve for guests while being super simple.
Nutritional Information Section
Now, let’s talk a bit about nutrition! Keep in mind that the nutritional values can vary based on the specific ingredients and brands you use, so these numbers are approximate. For my *Baked Sesame Chicken*, you can typically expect the following per serving:
- Calories: 350
- Fat: 15g
- Protein: 30g
- Carbohydrates: 25g
- Sugar: 8g
- Sodium: 600mg
These values make it a wholesome choice that’s not only delicious but also a great addition to your meal rotation! Enjoy knowing you’re fueling your body with tasty goodness.
Tips for Success
Alright, let’s make sure your *Baked Sesame Chicken* turns out absolutely perfect! First things first, don’t rush the marinating process. I always let my chicken marinate for a solid 30 minutes, but if you have the time, letting it sit for an hour or even overnight in the fridge really intensifies those flavors. Trust me, it’s worth the wait!
When it comes to baking, make sure your oven is fully preheated before putting the chicken in. This helps ensure that it cooks evenly and gets that lovely golden brown color. Also, keep an eye on it during the last few minutes of baking—ovens can be sneaky, and you don’t want it to overcook!
As for serving, I love pairing this chicken with a side of steamed broccoli or fluffy jasmine rice to soak up all that delicious glaze. A sprinkle of green onions or a dash of chili flakes on top adds a nice pop of color and a hint of heat too. Enjoy every crispy bite, and don’t forget to share your creation with loved ones—they’ll be begging for more!
Variations
If you’re feeling adventurous, there are so many fun ways to switch up your *Baked Sesame Chicken*! Here are some of my favorite ideas:
- Different Marinades: Try swapping out the soy sauce for teriyaki sauce for a sweeter twist, or add a splash of sriracha for a spicy kick! You can even experiment with a honey mustard marinade for a tangy flavor.
- Add Vegetables: Toss in some bite-sized veggies like bell peppers, snap peas, or carrots on the baking sheet for a one-pan meal. They’ll roast beautifully alongside the chicken and soak up that yummy glaze!
- Spice It Up: If you’re a fan of heat, sprinkle some red pepper flakes or add a dash of cayenne pepper to the marinade. It gives the dish an exciting zing that pairs perfectly with the sweetness of the honey.
- Nuts for Crunch: For added texture, toss in some chopped peanuts or cashews just before serving. They’ll bring a delightful crunch that complements the crispy chicken.
- Herb Infusion: Experiment with fresh herbs like cilantro or basil. Toss them in right before serving for a burst of freshness that brightens up every bite!
- Gluten-Free Option: Use tamari instead of soy sauce to make it gluten-free without sacrificing flavor. It’s just as delicious!
The possibilities are endless, so feel free to get creative and make this recipe your own! Each variation brings a new twist to the table, and I can’t wait for you to try them!
Storage & Reheating Instructions
Let’s talk about what to do with any leftovers of your tasty *Baked Sesame Chicken*. First off, make sure to let it cool down to room temperature before storing. I usually transfer it to an airtight container—this keeps it fresh and prevents any weird fridge odors from seeping in. You can store it in the fridge for about 3-4 days, and trust me, it’s just as delicious the next day!
If you want to keep it longer, you can freeze your leftovers! Just wrap individual portions tightly in plastic wrap or place them in freezer bags. They’ll last for about 2-3 months in the freezer. When you’re ready to enjoy it again, simply thaw it in the fridge overnight.
Now, for reheating, there are a couple of options that work well. If you’ve got the time, popping it in the oven at 350°F (175°C) for about 10-15 minutes gives it that nice crispiness back. Just cover it loosely with foil to prevent it from drying out. If you’re in a hurry, the microwave works too—just heat in short bursts of 30 seconds, stirring in between, until it’s warmed through. I always like to add a splash of water or a drizzle of soy sauce before microwaving to keep it moist. Enjoy your leftovers just as much as the first time around!
FAQ Section
Can I use chicken thighs instead of breasts?
Absolutely! Chicken thighs are a fantastic option if you want a juicier result. Just keep an eye on the cooking time as they might take slightly longer to cook through.
What can I substitute for honey?
If you’re looking for alternatives, maple syrup or agave nectar can work beautifully as substitutes. They’ll give a slightly different flavor, but they’re still delicious!
How do I know when the chicken is done?
The best way to check is to use a meat thermometer; it should read 165°F (75°C) in the thickest part. If you don’t have one, just cut into a piece, and it should be no longer pink inside.
Can I make this ahead of time?
Yes! You can marinate the chicken a day in advance and keep it in the fridge. Just bake it when you’re ready to eat, and you’ll have a delicious meal in no time!
What side dishes pair well with *Baked Sesame Chicken*?
I love serving it with jasmine rice or quinoa, along with steamed broccoli or stir-fried veggies. You could even toss in a simple salad for a nice crunch!
Can I make this recipe spicy?
Absolutely! Add some red pepper flakes to the marinade or toss in some chopped fresh chili for an extra kick. It’s a great way to balance the sweetness!
Is this dish gluten-free?
To make it gluten-free, just swap the soy sauce for tamari, and you’re good to go! It’s just as tasty without the gluten.
Can I bake this in an air fryer?
Yes! If you have an air fryer, you can cook it at around 375°F (190°C) for about 15-20 minutes, checking for doneness just like you would in the oven.
Baked Sesame Chicken: 7 Irresistible Tips for Perfection

Crispy and flavorful baked sesame chicken with a delicious glaze.
- Prep Time: 10 minutes
- Cook Time: 25 minutes
- Total Time: 35 minutes
- Yield: 4 servings 1x
- Category: Main Dish
- Method: Baking
- Cuisine: Asian
- Diet: Gluten Free
Ingredients
Scale
- 1 lb chicken breast, cut into bite-sized pieces
- 1/4 cup soy sauce
- 2 tbsp sesame oil
- 2 tbsp honey
- 1 tbsp rice vinegar
- 2 cloves garlic, minced
- 1 tbsp ginger, minced
- 1/4 cup sesame seeds
- Salt and pepper to taste
Instructions
- Preheat your oven to 400°F (200°C).
- In a bowl, mix soy sauce, sesame oil, honey, rice vinegar, garlic, and ginger.
- Add chicken pieces to the marinade and mix well. Let it marinate for 30 minutes.
- Spread chicken on a baking sheet lined with parchment paper.
- Sprinkle sesame seeds over the chicken.
- Bake for 20-25 minutes or until chicken is cooked through.
- Serve with rice or vegetables.
Notes
- You can adjust the sweetness by adding more or less honey.
- Serve with steamed broccoli for a complete meal.
Nutrition
- Serving Size: 1 serving
- Calories: 350
- Sugar: 8g
- Sodium: 600mg
- Fat: 15g
- Saturated Fat: 2g
- Unsaturated Fat: 10g
- Trans Fat: 0g
- Carbohydrates: 25g
- Fiber: 1g
- Protein: 30g
- Cholesterol: 70mg
Keywords: Baked Sesame Chicken, Chicken Recipes, Asian Cuisine


What do you think?
Share your thoughts, tips, or variations on this recipe!